After successfully placing new service order, server provisioning process will start automatically. This process should take up to 15 minutes. As soon as it ends, you will receive a server activation letter by email. This email contains all the information you need to access the server.
If you are using MacOS device, follow the steps below to easily access your virtual server:
STEP 1:
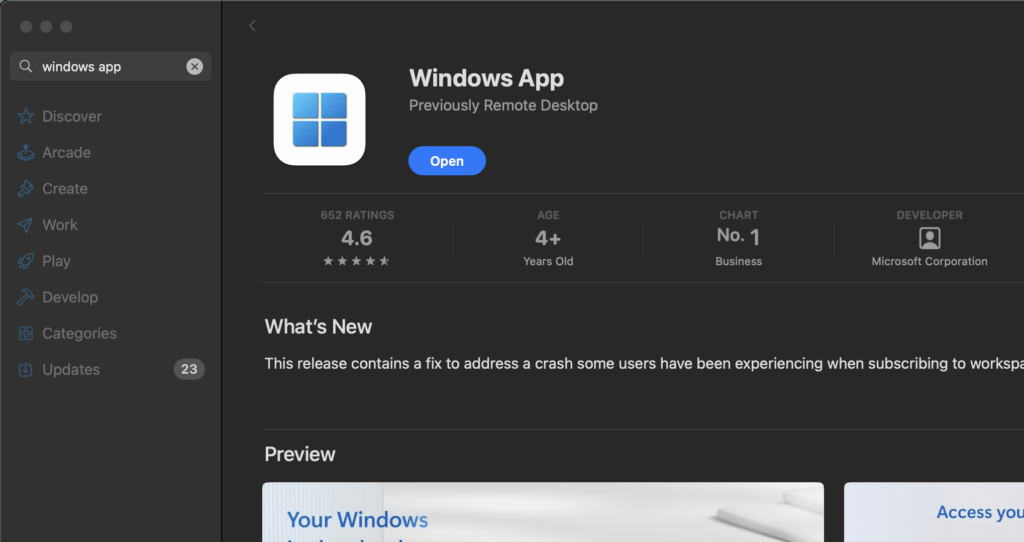
Download application called “Windows App” (formerly “Microsoft Remote Desktop”) from App Store.
STEP 2:
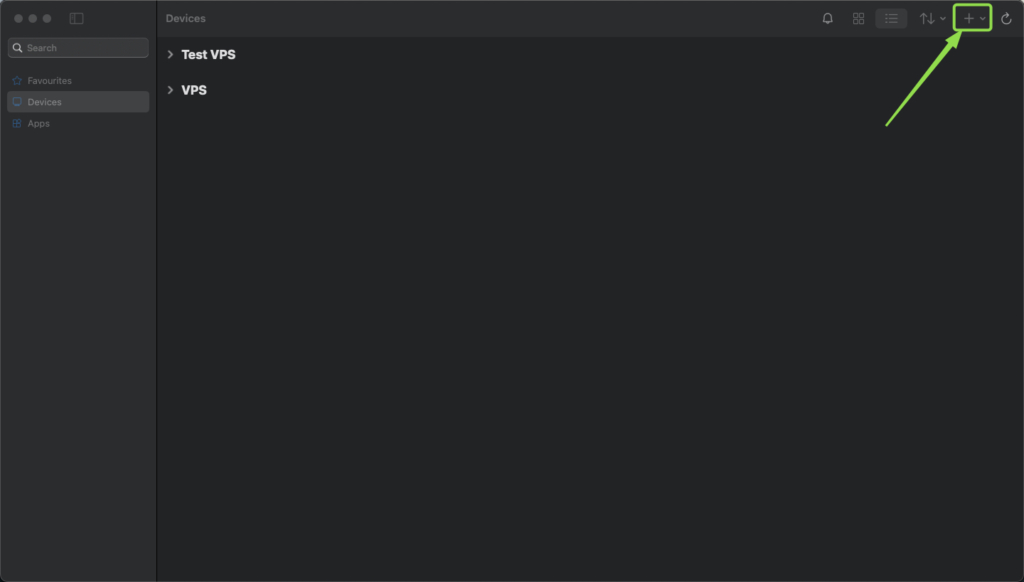
After opening the application, press + icon at the top-right corner and select “Add PC”.
STEP 3:
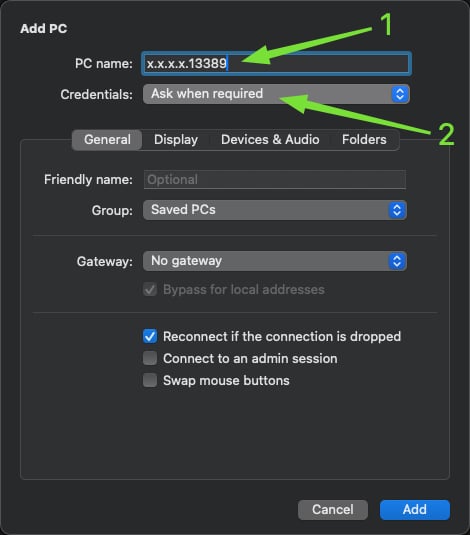
In the PC name field, paste the IP address of your new server from service activation email in the following format: x.x.x.x:13389 where x is servers IP address, do not forget to specify port after IP.
After entering the IP address, press on “Credentials” drop down menu. Select “Add Credentials”, new window will open.
STEP 4:
Enter the credentials sent to you from the servers activation email and then press “Add“.
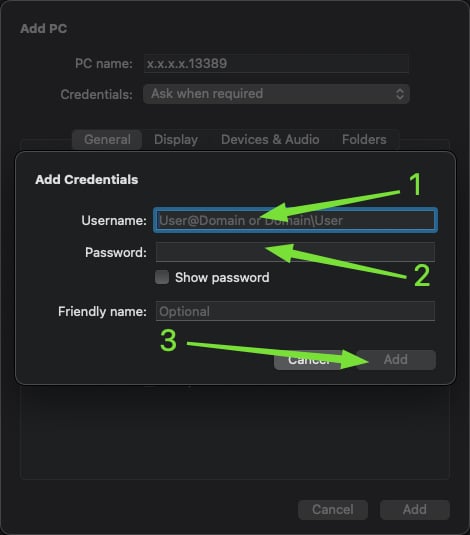
Please note: This is the part where spaces in the username or password field can be accidentally pasted. Make sure that you carefully select and copy your credentials from the activation email and no spaces are being copied.
STEP 6:
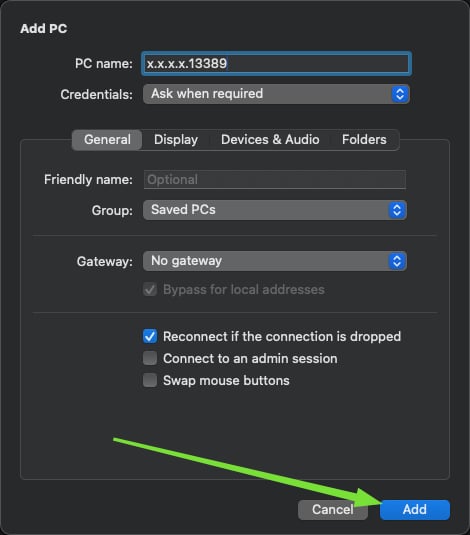
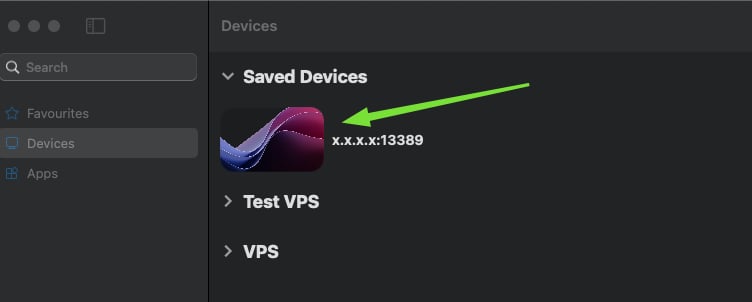
Press “Add” again and your remote connection will be saved. On the main application window, click on the recently added server to establish remote connection to it.
STEP 7:
Check the box Always trust …. and then press Continue.
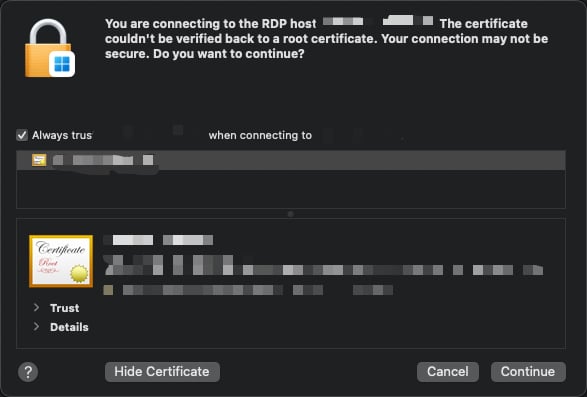
STEP 8:
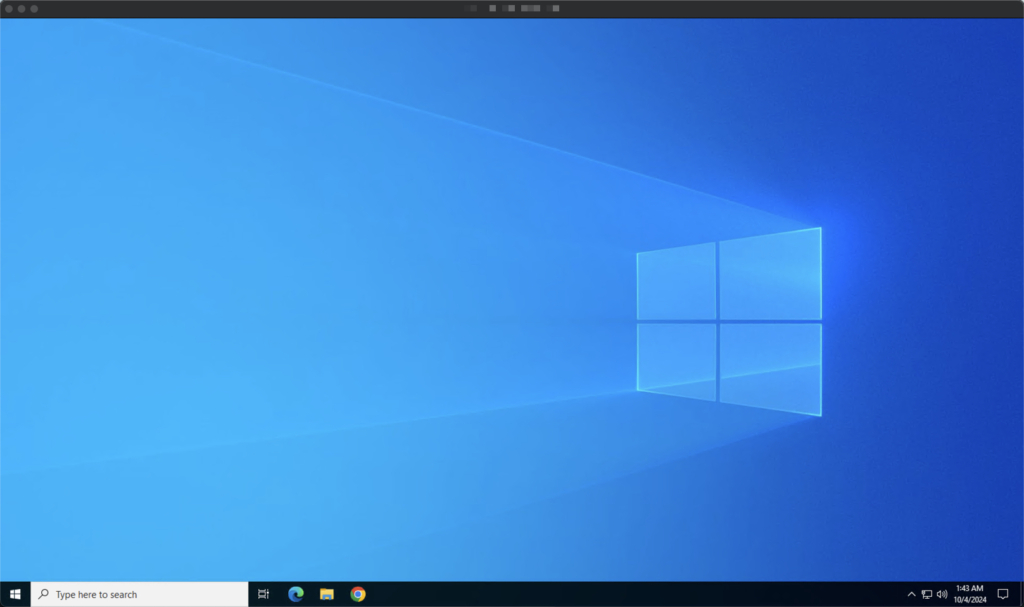
If everything is done correctly, you should see your servers desktop.
